I'm sick. As a dog. Want to die. Need more cough drops!
Mrs. H

Sunday, July 10, 2011

Friday, July 8, 2011
Closing Shifts Stink
My first day back at work was Tuesday, and I have had closing shifts ever since. Considering I don't get home till 11:30 and don't wake up till 9:30, I never have time to actually DO anything to blog about!
However, yesterday morning I started on some vegetable broth, using about-to-go-bad mushrooms, the innards of a celery bunch, a left over leek stalk, some about-to-go-bad onions, some carrots and some extra corn. I popped it all in my crock pot, filled it up to the top with water and proceeded to leech the nutrients and flavor out of the vegetables over a span of 24 hours.
The end product was a little spicy. Next time, I shant be putting in pepper with the broth.
This morning I was going to make a kale-wrapped-chicken thing that came to me in a dream, but Mr. H (God love him) pulled out an entire bag of chicken instead of just 2 breasts...
Crap.
So instead, I'm making chicken stew right now (using some of my homemade vegetable broth) and tomorrow I'm going to make double of the kale-wrapped-chicken.
Instead of posting a recipe for vegetable broth, I'm just going to post the link of the website I used when trying to figure out the best way to make a vegetable broth: Vegetable Broth
Enjoy!
Peace,
Mrs. H
However, yesterday morning I started on some vegetable broth, using about-to-go-bad mushrooms, the innards of a celery bunch, a left over leek stalk, some about-to-go-bad onions, some carrots and some extra corn. I popped it all in my crock pot, filled it up to the top with water and proceeded to leech the nutrients and flavor out of the vegetables over a span of 24 hours.
The end product was a little spicy. Next time, I shant be putting in pepper with the broth.
This morning I was going to make a kale-wrapped-chicken thing that came to me in a dream, but Mr. H (God love him) pulled out an entire bag of chicken instead of just 2 breasts...
Crap.
So instead, I'm making chicken stew right now (using some of my homemade vegetable broth) and tomorrow I'm going to make double of the kale-wrapped-chicken.
Instead of posting a recipe for vegetable broth, I'm just going to post the link of the website I used when trying to figure out the best way to make a vegetable broth: Vegetable Broth
Enjoy!
Peace,
Mrs. H
Tuesday, July 5, 2011
Leek and Celery Soup
Dude, I missed a day on the whole blogging thing! My bad. Visiting people in Gainesville was EXHAUSTING. Fun, though!
To make up for it, last night I pulled my CrockPot out and dusted it off (poor unused Crockpot!) and made some YUMMY Leek and Celery Soup.
You all are going to hate me.
Because I didn't measure anything out. So this recipe is gonna suck a little...
And...
I didn't take any pictures of the process...
But it's still delicious and you can still try!!!
H'okay!
Leek and Celery Soup
Ingredients
8 cups vegetable broth
4 Tbsp butter, slice in 1/2 inch pats
2 Stalks of Leek
4 big stalks of celery (as in, the outermost stalks)
1/2 red onion
1 small yellow onion
1 heaping handful of sliced mushrooms
Italian herbs (just a couple of shakes)
1 Tbsp Spinach spepper (aka the dehydrated Spinach leaves that I salted too much and crumbled up for garnish)
Sea Salt
Directions
1. Cut the ends off the leeks. Slice them in half, then start pulling them apart and washing them. Do not skip this step; leeks are infamous for the gross mud they hide.
2. Start slicing them up, end to end, about 1/2 inch pieces.
3. Wash and slice up the celery the exact same way.
4. For both onions, slice them at about half an inch, then chopped the slices up.
5. If you have precut mushrooms, like I did, you can skip this step. If not, just slice up some mushrooms, slicing down towards the stem.
6. Put the vegetable broth into your crockpot, followed by the butter.
7. Throw all the vegetables in.
8. Add the Italian seasoning and Spinach spepper.
9. Cook on high for an hour, then lower the temperature and cook for another 7 hours.
10. When the soup is done (aka the vegetables are RIDICULOUSLY tender and delicious), add some sea salt to your liking and turn off the crockpot.
Now you can eat it all now, or you can freeze it and save for later. If you don't like the texture of the vegetables, but you do like the flavor of the soup, you can blend the entire thing together so that it's not a chunky soup! Enjoy!
Peace,
Mrs. H
To make up for it, last night I pulled my CrockPot out and dusted it off (poor unused Crockpot!) and made some YUMMY Leek and Celery Soup.
You all are going to hate me.
Because I didn't measure anything out. So this recipe is gonna suck a little...
And...
I didn't take any pictures of the process...
But it's still delicious and you can still try!!!
H'okay!
Leek and Celery Soup
Ingredients
8 cups vegetable broth
4 Tbsp butter, slice in 1/2 inch pats
2 Stalks of Leek
4 big stalks of celery (as in, the outermost stalks)
1/2 red onion
1 small yellow onion
1 heaping handful of sliced mushrooms
Italian herbs (just a couple of shakes)
1 Tbsp Spinach spepper (aka the dehydrated Spinach leaves that I salted too much and crumbled up for garnish)
Sea Salt
Directions
1. Cut the ends off the leeks. Slice them in half, then start pulling them apart and washing them. Do not skip this step; leeks are infamous for the gross mud they hide.
2. Start slicing them up, end to end, about 1/2 inch pieces.
3. Wash and slice up the celery the exact same way.
4. For both onions, slice them at about half an inch, then chopped the slices up.
5. If you have precut mushrooms, like I did, you can skip this step. If not, just slice up some mushrooms, slicing down towards the stem.
6. Put the vegetable broth into your crockpot, followed by the butter.
7. Throw all the vegetables in.
8. Add the Italian seasoning and Spinach spepper.
9. Cook on high for an hour, then lower the temperature and cook for another 7 hours.
10. When the soup is done (aka the vegetables are RIDICULOUSLY tender and delicious), add some sea salt to your liking and turn off the crockpot.
Now you can eat it all now, or you can freeze it and save for later. If you don't like the texture of the vegetables, but you do like the flavor of the soup, you can blend the entire thing together so that it's not a chunky soup! Enjoy!
Peace,
Mrs. H
Sunday, July 3, 2011
Tree-Hugger
So, yesterday we decided to go out of town and visit some friends in Gainesville.
So I don't have anything to post about today.
So you get a picture (drawn by moi) of my friend Tyler hugging a tree.

Hippie.
Peace,
Mrs. H
So I don't have anything to post about today.
So you get a picture (drawn by moi) of my friend Tyler hugging a tree.

Hippie.
Peace,
Mrs. H
Saturday, July 2, 2011
Dehydrated Spinach Leaves!
So I wanted to make fruit leathers, soooo bad. So I thought to myself, "Psh, I don't need a recipe! I'm a badass and can figure it out myself.
So I bought some guava paste. And laid it out on some wax paper in my dehydrator.
And waited.
Oh God it was horrible. It was mushy and then dry and cracky and dried to the wax paper...
In the end, I trashed it.
But I still wanted to dehydrate something!
So I opened the fridge. What do I have?
Oh, 2 week old spinach leaves that will probably go bad VERY soon and will not get eaten as salad.

BAM! Instant item to dehydrate.
So I threw the leaves into a bowl, drizzled it with olive oil, salt, and pepper and mixed it up.

Mmm boy.
ONTO THE DEHYDRATOR WITH YOU!

Now I have one of those cheap dehydrators that doesn't have a temperature setting, so I just pressed the on button.
And WAITED. I actually didn't wait that long, because spinach leaves are thin and don't have a lot of water. I can only imagine what would have happened if I tried dehydrating iceberg lettuce...
So when they were all finished, I tossed them into one of my awesome new Apothecary jars (WOOT). So pretty!

But they were REALLY salty. Like...I used too much salt...
So in the end I decided to crumble them up, and I'm going to use them to garnish food later!
Peace,
Mrs. H
So I bought some guava paste. And laid it out on some wax paper in my dehydrator.
And waited.
Oh God it was horrible. It was mushy and then dry and cracky and dried to the wax paper...
In the end, I trashed it.
But I still wanted to dehydrate something!
So I opened the fridge. What do I have?
Oh, 2 week old spinach leaves that will probably go bad VERY soon and will not get eaten as salad.

BAM! Instant item to dehydrate.
So I threw the leaves into a bowl, drizzled it with olive oil, salt, and pepper and mixed it up.

Mmm boy.
ONTO THE DEHYDRATOR WITH YOU!

Now I have one of those cheap dehydrators that doesn't have a temperature setting, so I just pressed the on button.
And WAITED. I actually didn't wait that long, because spinach leaves are thin and don't have a lot of water. I can only imagine what would have happened if I tried dehydrating iceberg lettuce...
So when they were all finished, I tossed them into one of my awesome new Apothecary jars (WOOT). So pretty!

But they were REALLY salty. Like...I used too much salt...
So in the end I decided to crumble them up, and I'm going to use them to garnish food later!
Peace,
Mrs. H
Friday, July 1, 2011
Apothecary Jars
Zomg, I have been wanting to make apothecary jars ever since I read this post.
But I could NEVER find jars with lids on them!
It was frustrating, to say the least.
So today, I'm wandering around Goodwill, attempting to take my mind off a 16 piece, perfect condition, $15 dining set (in BLUE, like I want my dishes to be), when I came across not 1, not 2, but FOUR jars with lids! (Well, technically I came across 3 but I found a 4th one a few minutes later in another aisle!)

It was a joyous moment. You should have seen me, I was hoarding those jars in my arms like a little old lady who found a bunch of porcelain cats.
 I also grabbed a bunch of candle sticks to glue them on and went on my merry way.
But not before buying a plastic pitcher, almost brand new, that retails at target for like $10 or $15. Eff you, Target!

Anyway, so I had to make a trip to Ace Hardware in order to buy some gah-lue, and then it was home to start putting together my jars! Please note, I just look at all the glue in the glue section at Ace Hardware, and this one's package said good for glass. So it's the one I picked. I'm sure there are several other glues just as good as the one I picked!
*SQUIRREL FINGERS!!!*
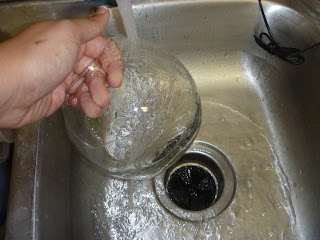 So first things first, clean the jars. Soap and hot water will take that sticky adhesive from price tags off! I also cleaned the candle sticks, but they were pretty good to begin with.
 Next, make a circle of glue on the bottom of the jar, the same size as the top of your candlestick.
 Put the candlestick top onto the bottom of the jar.
 Put a heavy book on top.
And wait.
 TADA! Apothecary jar! I know this finished one isn't the same as the one in the others pictures, but it was the first dry, and I am impatient!

Peace,
Mrs. H
But I could NEVER find jars with lids on them!
It was frustrating, to say the least.
So today, I'm wandering around Goodwill, attempting to take my mind off a 16 piece, perfect condition, $15 dining set (in BLUE, like I want my dishes to be), when I came across not 1, not 2, but FOUR jars with lids! (Well, technically I came across 3 but I found a 4th one a few minutes later in another aisle!)
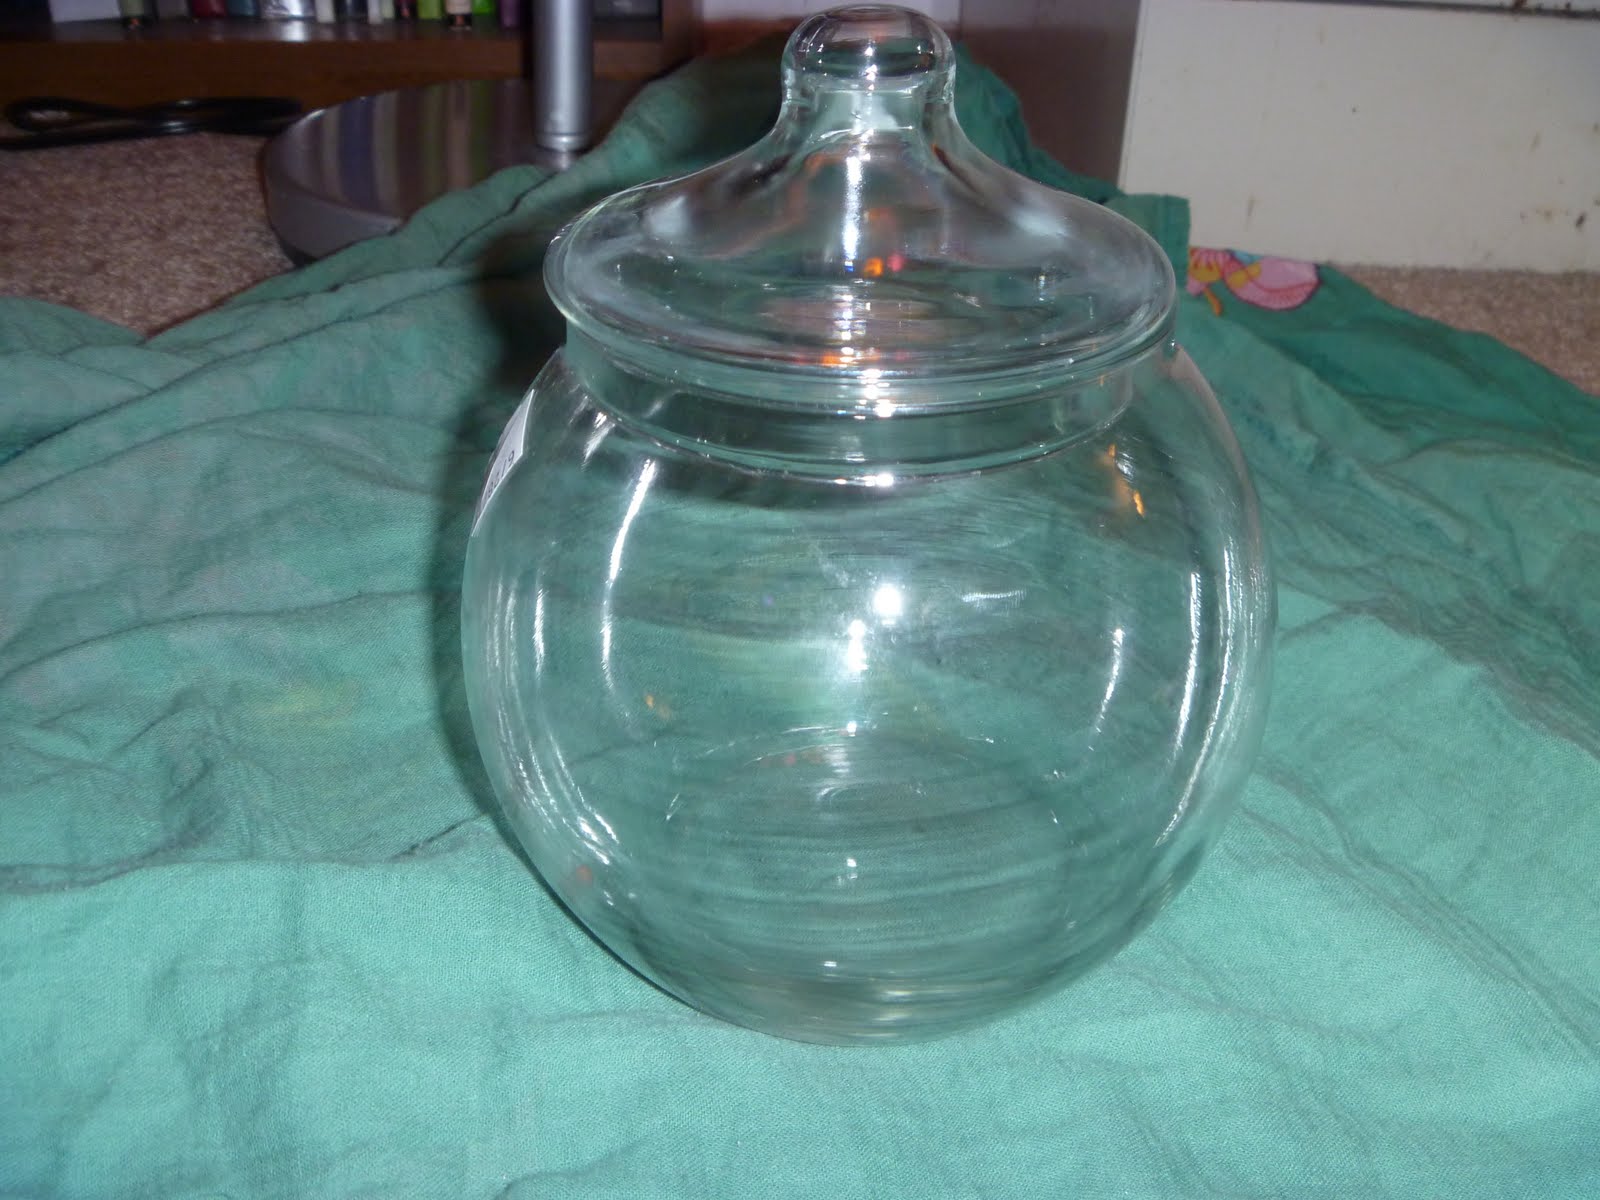
It was a joyous moment. You should have seen me, I was hoarding those jars in my arms like a little old lady who found a bunch of porcelain cats.
 I also grabbed a bunch of candle sticks to glue them on and went on my merry way.
But not before buying a plastic pitcher, almost brand new, that retails at target for like $10 or $15. Eff you, Target!

Anyway, so I had to make a trip to Ace Hardware in order to buy some gah-lue, and then it was home to start putting together my jars! Please note, I just look at all the glue in the glue section at Ace Hardware, and this one's package said good for glass. So it's the one I picked. I'm sure there are several other glues just as good as the one I picked!
*SQUIRREL FINGERS!!!*
 So first things first, clean the jars. Soap and hot water will take that sticky adhesive from price tags off! I also cleaned the candle sticks, but they were pretty good to begin with.
  Next, make a circle of glue on the bottom of the jar, the same size as the top of your candlestick.
  Put the candlestick top onto the bottom of the jar.
 Put a heavy book on top.
And wait.
 TADA! Apothecary jar! I know this finished one isn't the same as the one in the others pictures, but it was the first dry, and I am impatient!
Peace,
Mrs. H
Grape Sorbet via MY NEW FOOD PROCESSOR
So sometime last year I started making "banana ice cream" by cutting up frozen bananas and tossing them into a blender.
SO DELICIOUS.
So time consuming. A blender is not the best tool for banana ice cream.
Then I found a hand blender at Goodwill. That tool is AMAZING and makes my life soooooo much easier, for banana ice cream and blended soups and everything.
Then I started making strawberry sorbet.
YUMMMMMMMM.
Also time consuming, even with the hand blender.
Sigh. What is a food lover to do?
 Pan over to TADA my new Kitchenaid Food Processor! Hooray! Applause! Woooooo!
I have such high hopes for it, among those hopes being that it will make me strawberry sorbet with less time and mess and effort. I can't help it, I'm lazy. So I decided to christen my wonderful new toy with the wonderful concoction!
There's only one problem.
I'm out of strawberries, both frozen and fresh.
No worries! I have a massive stash of bananas in the freezer and OH GOOD GOD they've gone completely gooey...that can't be safe to eat. To the trash with you, my good 'nanas.
Sigh. What to do, what to do!

But wait! They are grapes in my fridge! Delicious, tart green grapes! I bet those would make a wonderful sorbet! All that wonderful water content that would ice up deliciously well inside! All I have to do is pop them in the freezer for an hour...
Or two...
or three...
Move forward 5 hours, to 3 in the morning, when I decide, "They are firm enough! I need to break this baby in RIGHT NOW!"
I wish I had gotten more pictures, but I was just SO EXCITED.
Just pretend you were there: I assembled my new toy, following the instructions carefully (which by the way, aren't that great). I pull the grapes out of the freezer, turn on the processor, and toss them in!
And they liquify.
 WHAT THE CRAP. Did I use the wrong blade attachment? Were they not frozen enough? With a sigh of defeat, I poured the slightly frothy, very chilled grape slush into a jar.
I grabbed a spoon, dipped it into the slush and tasted it.
YUMMYYYYYYYYY. I can only imagine that if this had been successful, it would have been my most delicious sorbet yet. Better than the strawberry, which I always added sugar to!
I decided to put the slush into the freezer to firm it up a bit, and we'll see what happens. I will definitely be trying this out again, leaving the grapes in the freezer overnight to completely freeze and firm up and I'll do 2 different batches to test out both blades.
I WILL have grape sorbet, as God as my witness!!!
Peace,
Mrs. H
SO DELICIOUS.
So time consuming. A blender is not the best tool for banana ice cream.
Then I found a hand blender at Goodwill. That tool is AMAZING and makes my life soooooo much easier, for banana ice cream and blended soups and everything.
Then I started making strawberry sorbet.
YUMMMMMMMM.
Also time consuming, even with the hand blender.
Sigh. What is a food lover to do?
 Pan over to TADA my new Kitchenaid Food Processor! Hooray! Applause! Woooooo!
I have such high hopes for it, among those hopes being that it will make me strawberry sorbet with less time and mess and effort. I can't help it, I'm lazy. So I decided to christen my wonderful new toy with the wonderful concoction!
There's only one problem.
I'm out of strawberries, both frozen and fresh.
No worries! I have a massive stash of bananas in the freezer and OH GOOD GOD they've gone completely gooey...that can't be safe to eat. To the trash with you, my good 'nanas.
Sigh. What to do, what to do!

But wait! They are grapes in my fridge! Delicious, tart green grapes! I bet those would make a wonderful sorbet! All that wonderful water content that would ice up deliciously well inside! All I have to do is pop them in the freezer for an hour...
Or two...
or three...
Move forward 5 hours, to 3 in the morning, when I decide, "They are firm enough! I need to break this baby in RIGHT NOW!"
I wish I had gotten more pictures, but I was just SO EXCITED.
Just pretend you were there: I assembled my new toy, following the instructions carefully (which by the way, aren't that great). I pull the grapes out of the freezer, turn on the processor, and toss them in!
And they liquify.
 WHAT THE CRAP. Did I use the wrong blade attachment? Were they not frozen enough? With a sigh of defeat, I poured the slightly frothy, very chilled grape slush into a jar.
I grabbed a spoon, dipped it into the slush and tasted it.
YUMMYYYYYYYYY. I can only imagine that if this had been successful, it would have been my most delicious sorbet yet. Better than the strawberry, which I always added sugar to!
I decided to put the slush into the freezer to firm it up a bit, and we'll see what happens. I will definitely be trying this out again, leaving the grapes in the freezer overnight to completely freeze and firm up and I'll do 2 different batches to test out both blades.
I WILL have grape sorbet, as God as my witness!!!
Peace,
Mrs. H
Subscribe to:
Posts (Atom)